Interview Lighting 101: Mastering the Three-Point Setup
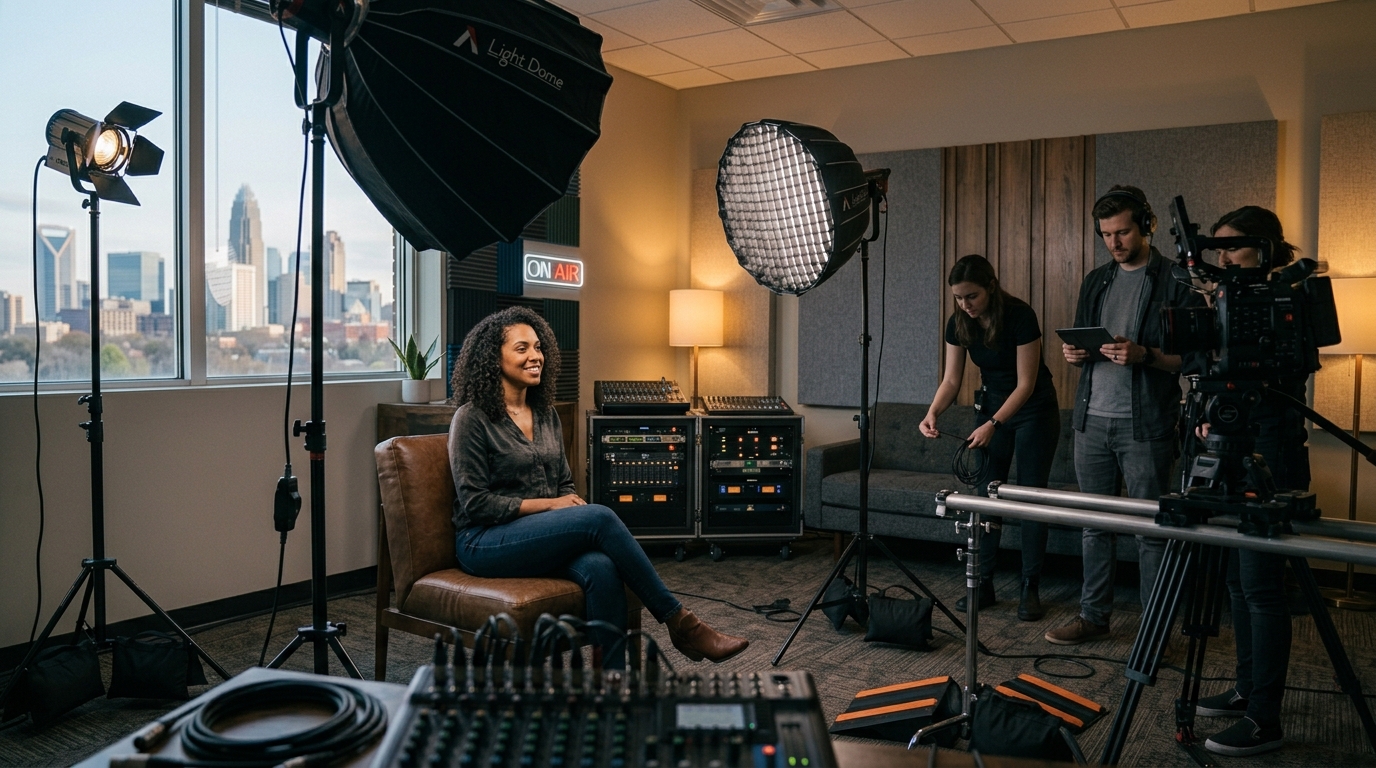
Nearly every polished interview you have ever watched was lit with some variation of the three-point setup. It is the foundation of portrait lighting for a reason: three sources, each with one clear job, combining into an image with shape, depth, and separation. Master it and you can make anyone look good, anywhere — a CEO in a corporate piece, a documentary subject, a podcast guest on camera. Here is each light's role, where to put it, the ratios that control mood, and when you have earned the right to break the rules.
The key light: your main source
The key is the primary light on your subject's face, and every other decision flows from it. Place it 30 to 45 degrees off the camera axis and slightly above eye line, angled down. That height matters more than beginners expect: too low reads as horror-movie uplight, too high digs shadows into the eye sockets. Slightly above eye line, angled down, mimics the flattering geometry of natural light.
A soft source — a diffused panel or a softbox — flatters most faces, wrapping light around features instead of carving hard edges. The bigger and closer the source, the softer the light, which surprises people: moving a softbox closer makes it softer, not harsher, because it becomes larger relative to the face.
The side you key from determines the mood. Keying the camera side feels open and direct; keying the far side — so the face turns slightly into the light — adds shape and drama. Watch for the catchlight, the small reflection of the source in the subject's eyes. If the eyes have no catchlight, the face reads flat and lifeless no matter how well everything else is placed.
The fill light: contrast control
The fill controls contrast on the shadow side of the face. It should never compete with the key — the fastest way to spot amateur lighting is two equal sources flattening a face from both sides. Start at roughly a quarter of the key intensity and adjust to taste.
The key-to-fill relationship is called the ratio, and it is your mood dial. More fill reads corporate and friendly — appropriate for executive messaging and brand content. Less fill reads cinematic and serious — right for documentary and dramatic pieces. On a budget, a bounce card or white wall does the job beautifully; bounced fill is naturally soft and impossible to overdo by much. Many working DPs prefer bounce fill over a powered source precisely because it cannot fight the key.
The back light: separation
Also called a rim or hair light, the back light separates the subject from the background with a subtle edge of light on the shoulders and hair. Place it behind and above the subject, opposite the key, aimed at the back of the head and shoulders. Without it, subjects sink into dark backgrounds — especially subjects with dark hair against dark walls, where the silhouette simply merges.
Restraint is the skill here. A back light you consciously notice is too hot; you want an edge the viewer feels rather than sees. Flag it so it does not flare into the lens, and dial it down for bald subjects, where a hot rim becomes a distracting hotspot.
Do not forget the background
The fourth point of three-point lighting, as the joke goes. Give the background its own light or practicals — a lamp, a window, a slash of light on a wall — so it has depth, and keep it a stop or so darker than your subject. A lit subject against a dead background looks like a passport photo with better gear; a background with layers of light and shadow looks like cinema.
This is where studio shooting pays off. On a stage, the background is a deliberate design choice — a cyc wash, set dressing, practicals on dimmers — rather than whatever conference room wall you inherited. It is also where modest set design multiplies your lighting work.
A practical build order
- Seat your subject (or a stand-in) and set the camera frame first. Lighting to an unframed shot wastes time.
- Build the key alone. Watch the shadows and catchlight until the face looks good with one light.
- Add fill until shadow detail is where the tone of the piece wants it.
- Add the back light at the lowest level that still separates.
- Light the background last, a stop or so under the subject.
- Check on a real monitor, not the camera flip-out — ratios lie on small screens.
With a pre-rigged overhead grid, this build takes twenty to thirty minutes. On location with floor stands and taped stingers, budget an hour or more — one of the quiet arguments in the studio versus location decision.
Common mistakes
- Everything too flat: fill matching the key. Cut the fill and let the face have dimension.
- Key too high or too low: raccoon-eye shadows or horror uplight. Slightly above eye line, angled down.
- Hot rim light: if you notice the back light, reduce it.
- Ignoring glasses: reflections come from key height and angle — raise the key slightly and rotate it until the frames go quiet.
- Mixed color temperatures: daylight windows plus tungsten fixtures makes skin tones unfixable. Match your sources.
When to break the rules
Documentary looks often drop the back light for a more natural feel. Moody pieces kill the fill entirely and let shadows go rich. Some modern interview styles use a single enormous soft key and nothing else. All of these work — as deliberate choices. Once you can build the textbook setup in ten minutes, you have earned the right to break it deliberately, because you will know exactly what each missing light is costing you.
Frequently asked questions
Can I do three-point lighting with two lights?
Yes — key plus back light, with a bounce card as fill, is a complete professional setup and a common documentary package.
What ratio should I start with for corporate interviews?
Fill at about a quarter of key intensity is a safe, friendly starting point. Go brighter on fill for upbeat brand work, darker for editorial tone.
Does three-point lighting work for podcast video?
Completely — each host gets a key, shared or individual fill, and back lights for separation. The Imagicomm Studios podcast studio is pre-lit on exactly these principles so guests look good without a relight.
Practice makes perfect — and a pre-rigged stage makes practice fast. Book time on one of our stages at Imagicomm Studios, build the textbook setup under a real grid, and start developing the eye that lets you bend it.
Ready to shoot in Charlotte? Check studio availability or book a tour of Imagicomm Studios.